A lower-body kit can be small and still have a clear purpose. The important distinction is what each item actually does. A fabric loop adds elastic resistance, a cable ankle strap connects you to suitable gym equipment, and a barbell pad changes the contact surface around a compatible bar. They are not three versions of the same accessory.
We use this guide to help you choose a setup around the way you train. You will find home, gym and mixed-location examples, a component checklist and practical questions to ask before adding another piece. The aim is to give every item a job, avoid duplicate purchases and keep the equipment understandable when you arrive for a session.
Begin with where you train
Make two lists: equipment already available and equipment you need to bring. At home, the first list might contain a clear floor area and a mat. At a gym, it may include a cable machine, bench, rack or bar. Those starting points lead to different purchases. An attachment that makes sense beside a cable stack may do nothing useful in a room without one.
Then choose the exercises you intend to practice or learn. Keep them specific enough to reveal the setup. Side steps with a suitable loop, a cable movement with a compatible cuff and a barbell exercise are distinct arrangements. Each has its own connection points, space requirements and instructions. A bundle photograph can make them look like one complete system when they are actually separate uses.
If you are new to a movement, get help learning it before buying equipment on the assumption that the accessory will make the technique obvious. Padding does not teach a lift, and a strap does not determine your machine setup. A smaller kit that supports familiar movements can be a better starting point than a bag of equipment with no clear plan.
Give every piece a clear role
| Item | Its role | What else to establish |
|---|---|---|
| Fabric resistance loop | Adds resistance in movements suited to its shape and placement | Appropriate size, tension and exercise instructions |
| Long stretch band | Provides a longer elastic element for its intended exercises | Working length, grip and any approved anchor arrangement |
| Cable ankle strap | Connects the ankle area to compatible cable equipment | Suitable machine, connector and instructed setup |
| Barbell pad | Adds a padded contact surface around a compatible bar | Correct fit, fastening and exercise setup |
| Storage bag | Keeps the selected accessories together | Clean, dry equipment and an appropriate storage location |
Keep this distinction in mind when comparing piece counts. A set with several accessories is not necessarily several independent resistance tools. A bag, pad, strap and clip each contribute something different. Check what supplies the load and what only connects, cushions or organizes the equipment.
Choose a fabric loop around the intended movement
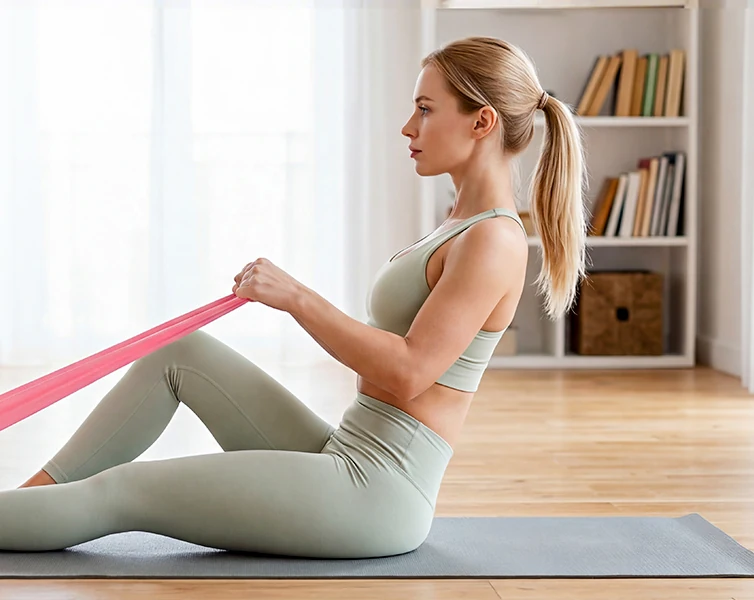
A short fabric loop is a compact option for selected hip and leg exercises. Start with the actual dimensions and resistance choices. The loop should suit the instructed placement and the movement you intend to perform. A broad textile surface can feel different from a thin elastic strip, but the material name alone does not determine fit or guarantee that the band stays in place.
Look at the inner surface and seams in the gallery. These photographs help you understand the construction and distinguish one option from another. If several tensions are included, identify them before the first session. Keep the lighter option available even after you become familiar with the set, because a different exercise may call for a different choice.
Do not turn the loop into a universal attachment. It is not a substitute for a cable cuff, barbell pad or lifting strap. Follow its intended uses and placement instructions. If the loop pulls you out of the planned movement or repeatedly shifts despite appropriate adjustment, reconsider the option or exercise instead of tightening it with improvised modifications.
Where a long stretch band fits
A longer flat band can serve a different role from a short fabric loop. The extra working length may support exercises involving the hands and feet, depending on the product's intended use. Check whether it is an open strip or a closed loop, how its dimensions are measured and which gripping or anchoring arrangements the instructions allow.
Do not use the word stretch as permission to pull the material as far as possible. Stay within the product's stated limits and choose an appropriate movement. If you need to wrap, knot or double the band in a way the instructions do not describe, pause and verify the setup rather than treating the modification as a routine adjustment.
A long band can be a useful addition when it fills a specific gap in your routine. It does not need to duplicate every job of the short loop. Compare the stretch band collection with the fabric loop collection, then use our band selection guide to compare format, materials and resistance labels.
Understand cable ankle straps before choosing a pair
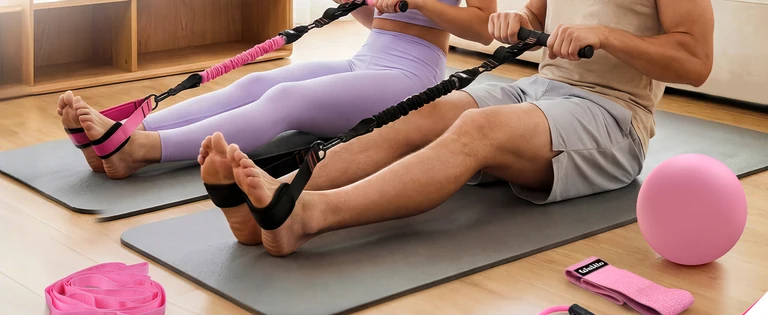
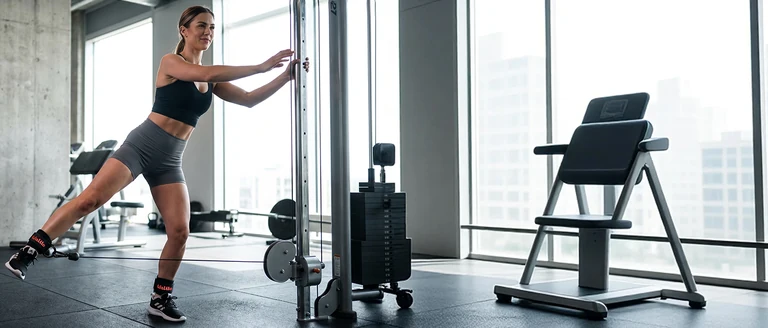
A cable ankle strap is an attachment. In a suitable setup, it connects to the machine through the intended hardware while the machine supplies resistance. That makes it different from a cuff included with an elastic band system. Read the selected product's description carefully so you know whether you are buying straps, a complete resistance set or another combination.
Check the adjustment range, fastening arrangement and attachment rings. The cuff should close as intended without relying on an improvised extension. Padding can change the contact feel, but it does not establish that every fit or exercise is appropriate. You should be able to inspect the fastening and connector clearly before loading the machine.
Ask the gym about compatible attachments and its rules for personal equipment. A ring fitting inside a clip is only one part of compatibility. The attachment must be appropriate for the machine, intended exercise and any applicable load guidance. Use the facility's or manufacturer's setup instructions, and ask a qualified member of staff when the connection is unfamiliar.
Check the entire connection, not only the metal ring
Follow the load path from the cuff to the machine. Check the strap material, stitching, fastening, ring and connecting hardware, then the machine attachment point. A problem anywhere along that path matters. Do not assume that a shiny connector proves the rest of the assembly is ready to use.
Fasten the cuff and arrange the connection according to its instructions before adding exercise effort. Confirm that the connector closes fully and the strap sits as intended. If it slips, twists into an uncomfortable position or cannot be fastened securely, stop and reset the arrangement. Adding more resistance will not solve a fit or connection problem.
Keep personal accessories identifiable so you can inspect your own equipment rather than accidentally using a similar-looking item. If a strap is shared, every user still needs to check the fit and condition. Store the pair together and avoid leaving one cuff clipped to a machine while you move elsewhere. Small organization choices help prevent confusing or incomplete setups.
Choose a barbell pad by fit and purpose
A barbell pad adds material between the bar and the contact area in a compatible exercise. To choose one, look at the pad's dimensions, opening and fastening method. Check the selected product's fit information against the bar you will use. A broad claim about standard bars should not replace a clear check of the actual equipment.
The pad should remain correctly positioned in the instructed setup. Before beginning a loaded movement, confirm how it closes and whether any securing straps are included or required. A pad that moves, opens or changes the intended bar position needs attention before the exercise continues. Do not add tape or other improvised fixes to compensate for an unsuitable fit.
Padding does not increase a bar's capacity, change the equipment's limits or make an unfamiliar lift automatically appropriate. It also does not replace learning where the bar belongs or how to enter and leave the exercise. If you are learning a barbell movement, use qualified instruction and the facility's safety procedures. Choose the pad as one accessory within that setup.
Decide whether a bundle solves a real need
A bundle can be convenient when you need several of its components and understand their separate uses. For example, a pad and ankle straps may both belong in a gym bag even though they are used at different stations. The value comes from the pieces fitting your routine, not from treating them as one interchangeable training system.
Make a simple inventory before comparing prices. List the items you already own, the condition of each and the missing piece that prompted the search. Then compare the selected bundle's contents. If most of the pieces duplicate suitable equipment you already have, a single accessory may be the more focused choice.
Check how the piece count is calculated. A pair of straps, two securing pieces and a bag can all contribute to the headline number. That is not necessarily a problem, but it changes the comparison with another set. Read the component list, inspect the full-kit image and confirm the chosen option before moving to the purchase tab.
Kit example one: a simple home lower-body setup
For a home routine built around bodyweight movements and suitable loop exercises, the core kit may be a fabric loop set and a clear floor area. A stable, appropriate mat can be helpful for floor work if you already use one. You do not need a cable strap when there is no cable machine, or a pad when the routine contains no compatible barbell exercise.
Choose a few movements you understand, such as a comfortable squat variation, a controlled floor bridge and instructed side steps with a suitable loop. The band does not have to be present in every exercise. Practice the movement first, then add appropriate resistance only when you can manage the whole repetition and return.
Keep the equipment easy to reach and the session easy to start. Store the loops together with their instructions, record which option you used and check the material before the next session. If your routine later needs more working length, consider a suitable long band as a separate decision. Our home training guide shows how to organize a repeatable week.
Kit example two: a focused gym accessory bag
If your gym provides machines and bars, begin with the attachments or contact surfaces you prefer to bring yourself. A compatible pair of ankle straps may be useful for planned cable exercises. A correctly fitted pad may serve a separate barbell movement. A short loop can support appropriate additional exercises, but it does not need to be added merely because the other accessories are being purchased.
Before choosing, check the equipment at the facility and ask about its rules. Confirm the machine connection, the bar dimensions relevant to the pad and where personal accessories may be stored during a session. That quick check can prevent arriving with a product that looks suitable online but does not work with the available station.
Arrange the bag by use. Keep the cuff pair together, the pad's securing pieces with the pad and any bands separate from sharp or rough objects. Bring only the items needed for that session when practical. A focused bag makes it easier to notice a missing component or worn fastening before you begin an exercise.
Kit example three: home and gym without unnecessary duplicates
For a mixed routine, decide which items travel and which stay in place. A compact loop set may move between home and gym, while a barbell pad stays with the equipment used for that exercise. Cable straps can remain in the gym bag if they have no role in the home routine. There is no need to carry the whole collection everywhere.
Keep separate setup notes for the two locations. A movement performed with an elastic band at home is not automatically the same as a cable-machine version at the gym. The resistance source, connection, available range and instructions differ. Record the equipment and setup so you do not compare two sessions as if only the location changed.
A mixed kit works best when additions follow a real need. If you consistently wish for one specific accessory at the gym, investigate that gap. If an item has stayed unused for weeks, reconsider its role before buying a similar one. Equipment should support the routine you practice, not a collection of possible routines you never have time to begin.
Compare the three setups side by side
| Training setting | Start by considering | Check before adding more |
|---|---|---|
| Home with clear floor space | A suitable loop and familiar bodyweight movements | Whether a longer band fills a real exercise need |
| Gym with compatible cable equipment | A correctly fitting cable ankle strap | Machine rules, connector and instructed setup |
| Gym with planned barbell work | A pad that fits the bar and intended exercise | Fastening, positioning and qualified technique guidance |
| Home and gym | A shared compact kit plus location-specific accessories | Which pieces genuinely need to travel |
These are shopping frameworks, not complete training prescriptions. Your equipment choice still depends on the exact products, available facilities and exercises you can perform appropriately. Use the table to narrow the decision, then read the relevant product details rather than purchasing every item in a row.
Keep resistance labels in context
Elastic bands and cable machines describe resistance in different ways. A nominal number on a band is not interchangeable with a number selected on a machine. Elastic force changes as the material stretches, while machine arrangements have their own characteristics. Keep your training records specific to the equipment instead of converting everything into an assumed equivalent weight.
The Performance Health explanation of band elongation illustrates why stretch matters for its products. It is useful background, but its color system and exact values are not WALITO specifications. For our products, use the selected option's stated information and the supplied instructions.
Choose resistance that lets you control the intended movement. A stronger loop or heavier machine setting is not a solution to a slipping cuff, awkward band placement or an unfamiliar technique. Resolve the setup first. When you change the resistance later, keep the rest of the arrangement consistent enough to understand what changed.
Look after the kit as separate materials
A mixed kit may combine textile, elastic material, foam, metal and hook-and-loop fasteners. Those components can require different care. Follow the instructions for each product instead of washing the entire bag as though every item has the same construction. Keep the instructions with the equipment or save them somewhere you can find them again.
Inspect the material and connection points before use, and check again when putting the kit away. Retire damaged components according to the manufacturer's guidance. The ACE resistance-band guidance emphasizes checking for damage and controlling the return of stretched material. These are useful general habits, not proof that every accessory follows identical maintenance rules.
Allow equipment to dry as directed before closing it inside a bag. Keep sharp objects and loose hardware from rubbing against bands, and store the kit away from children and pets. If something changes in feel or appearance, investigate before using it again. Do not assume an item is sound solely because you bought it recently or have used it successfully before.
Compare the details that change everyday use
Once two products appear to do the same job, compare the details you will notice during setup. For ankle straps, that includes how the fastening is adjusted, where the connector sits and whether the package contains one strap or a pair. For a barbell pad, look at the opening, the securing method and the space it occupies in your bag. For loops, compare the exact dimensions and the resistance options included.
Do not let matching colors make this decision for you. A coordinated set can be pleasant to use and easy to identify, but color does not establish compatibility between its components or with the equipment at your gym. Read each item's role separately. The same principle applies when you add a new accessory to a kit you already own.
Imagine the moment you will use the product. Will you be changing from a floor exercise to a cable station? Will you need to remove and store a pad between sets? Are there small securing pieces that could be left behind? These are ordinary workflow questions, but answering them can help you choose a practical bundle and decide how to organize it.
For a shared household or training partner, consider adjustment and identification. Each person should check their own fit, setup and equipment condition. Keep instructions available to everyone who uses the item, and do not assume that one person's comfortable arrangement suits another. If you use different resistance options, record the actual label so the choice is clear next time.
Read the care information before deciding where the kit will be stored. If you plan to leave it in a car or another place with changing conditions, compare that plan with the manufacturer's storage advice. If the routine involves carrying damp equipment home, allow time to unpack and care for it as instructed. Storage is part of owning the equipment, not an afterthought once the bag is full.
Finally, check whether the product page answers your specific question. A detailed gallery can clarify the arrangement of a strap or pad, while a specification table can help with dimensions. If neither resolves a compatibility issue, ask before ordering. A precise answer about your intended equipment is more useful than a broad promise that an accessory works for everyone.
A final checklist for the selected option
Before purchasing, identify the exact option and read its contents from beginning to end. Check dimensions, quantity and the components pictured with the product. Confirm whether a pair is included, whether securing pieces come with the pad and whether the photographs show equipment that must be supplied separately. Small details can change whether the kit is ready for your planned use.
Review fit and compatibility separately. A comfortable-looking cuff still needs the right machine connection. A padded bar accessory still needs the correct fit and fastening. A fabric loop still needs a suitable resistance and intended placement. No single label such as adjustable, universal or complete can answer all of those questions without the supporting details.
Finish by naming the job of every item you are about to buy. If the answer is clear, compare the final selected-option price and purchase terms in the purchase tab. If an item has no defined role, return to your routine and decide whether it can wait. A useful lower-body kit grows from the way you train.
Browse cable attachments when your gym supplies the resistance, explore lifting accessories for compatible barbell setups, or return to the WALITO collection to compare the available formats.