The best resistance band for your routine is the one that fits the movement, the space and the way you like to train. A short fabric loop, a long elastic band and a tube with handles can all add resistance, but they do different jobs. Start with those differences and the choice becomes much simpler.
At WALITO, we want you to understand the equipment before you choose a set. This guide helps you read the details that matter: band shape, materials, working length, resistance labels and included attachments. It also explains where a compact set can be useful and where you need a different setup. You do not need the largest bundle to begin. You need the right pieces for the exercises you intend to practice.
Start with the movement you want to train
Before comparing colors or prices, write down two or three exercises you already know or plan to learn. That small list is more useful than a broad goal such as getting stronger. A side step with a loop around the thighs asks something different of a band than a standing row with handles. The first needs a short loop that stays in an appropriate position. The second needs enough working length and a suitable way to hold or anchor the resistance.
Then identify the setting. At home, you may want equipment that works without a fixed anchor. In a gym, you might already have access to a cable machine and need only a compatible attachment. For travel, storage size matters, but so does knowing how you will use the equipment at your destination. A small bag does not create a suitable anchor or a clear training area.
Keep your first choice focused. If your immediate goal is to add a few lower-body exercises to a routine, a compact loop set may be enough. If you want several upper-body movements, look more closely at long bands or handled systems. Our lower-body kit guide separates the equipment used at home from accessories that rely on gym machines.
Know the main band formats
| Format | Useful starting point | Check before choosing |
|---|---|---|
| Short fabric loop | Selected hip and leg movements | Loop dimensions, resistance options and recommended placement |
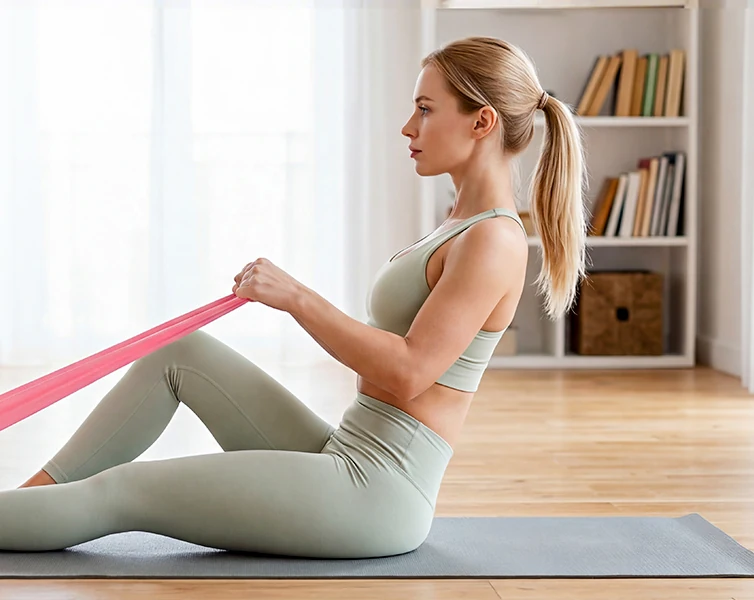
| Long flat band or loop | Exercises requiring more working length | Open or closed construction, dimensions and approved gripping method |
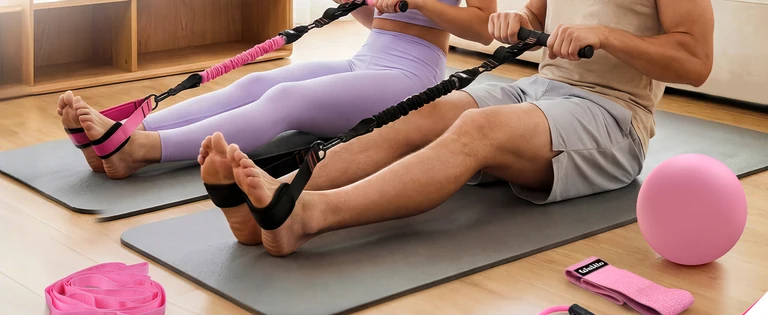
| Tubes with handles | A handled resistance setup for a range of movements | Included tubes, connectors, handles and anchor instructions |
| Bands with ankle cuffs | Lower-body movements using the supplied system | Cuff fit, connection method and the complete kit contents |
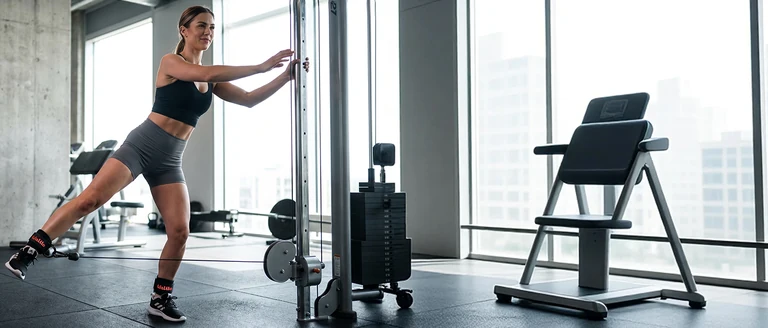
| Cable-machine ankle straps | Compatible gym cable exercises | Machine connection and whether the package includes resistance |
Product names sometimes blur these distinctions. A listing may use the word band for an entire kit, even when several accessories are shown. Read the selected option and the component list together. A photograph of a complete workout scene can include a mat, shoes, bench or machine that is not part of the purchase.
When a fabric loop makes sense
A short fabric loop is easy to recognize: a continuous band wide enough to sit across part of the leg. It can be a practical choice when your exercise calls for that shape, especially if you prefer a textile surface. The loop's width and dimensions matter as much as its color. A band that suits one placement or movement may not be comfortable or appropriate for another.
Look at the inner surface in the gallery. If a product has a textured or grippy lining, the close-up should help you understand where it contacts clothing or skin. Treat this as a construction detail, not a promise that the band can never move. Clothing, placement, movement and the fit of the loop all affect your experience. An equipment adjustment is preferable to forcing an awkward position through a set.
Also check the resistance choices. Some sets use several loops with different tensions; others may offer a single selected option. Do not assume that the darkest color is always strongest or that every color shown is included. The exact product page should identify the option you are choosing. Start there rather than relying on a color convention from a different set.
When you need more working length
A longer band offers a different starting geometry. Depending on its construction and instructions, it may be used for movements involving the hands, feet or a suitable anchor. A long closed loop and a flat open strip are not interchangeable descriptions. Check the actual shape in the photographs before deciding that a familiar exercise will work with it.
Length is particularly important when comparing equipment online. A measurement may describe the band laid flat, its full circumference or its unstretched end-to-end length. Those are different measurements. If a specification does not make the convention clear, avoid building a precise exercise setup around a guessed dimension. Use the product's illustration and supplied instructions to understand the intended arrangement.
Longer does not automatically mean easier, and shorter does not automatically mean stronger. The material, cross-section and amount of stretch all matter. Choose a format that gives you an appropriate range of movement within the product's stated limits. Do not shorten a band with improvised knots or wrap it around rough hardware to make an unsuitable option fit your plan.
What to inspect in a handled tube set
A tube set is a small system rather than one isolated band. The tubes provide resistance, the handles give you a gripping surface, and the connectors link the parts. If an anchor or cuffs are included, they add other possible setups. The quality of your choice depends on understanding the whole system, including the pieces that are easy to overlook in a main photograph.
Count the tubes and compare their individual labels. Then inspect how the tubes attach to the handles. A set with detachable components may allow specified combinations, but the presence of clips alone does not establish permission to attach any accessory you own. Use compatible components according to the instructions, and check the connection before beginning an exercise.
Think about how you like to hold equipment. Handle shape, grip space and strap arrangement can affect comfort. The handle does not need to look dramatic to be useful; it needs to suit the movement and the way you hold it. If your main interest is a gym cable machine, a replacement handle accessory may be the relevant product instead of a complete resistance set.
Separate ankle-band systems from cable straps
Two products can both wrap around an ankle while doing very different jobs. A cuff supplied with an elastic resistance system is part of that system. A cable-machine strap usually provides an attachment point for compatible gym equipment. The strap itself does not become a resistance band simply because it appears in a lower-body workout photograph.
Check whether the package contains elastic elements, cuffs, connecting clips or only straps. Then look at the fastening method and the position of the connection rings. Adjustable does not mean unlimited fit, and a metal ring does not establish universal compatibility. The selected product's dimensions and instructions should guide both decisions.
If you train in two places, you may need two different arrangements. A home cuff-and-band set can be useful without reproducing a cable stack's setup. A gym strap may be useful when the machine supplies the resistance. Buying one with the expectation that it automatically replaces the other is an avoidable mistake. Compare the complete equipment requirements, not just the cuffs.
Read resistance labels as equipment information
Resistance labels help distinguish options, but they do not describe every moment of an exercise. Elastic resistance changes as the material stretches. That is why a band can feel easier near one part of a movement and harder near another. The THERABAND manufacturer explanation of elongation and force describes this relationship for its products; its color chart and numeric values should not be transferred to another brand.
A number printed on a tube is therefore not the same as a dumbbell that has that mass. Nor should the largest number on a bundle become your default training target. It may refer to a nominal combined rating rather than the tube you are actually using. Read the individual labels and the selected set's explanation before comparing totals.
For repeatable training, record the equipment and the setup rather than only a pound figure. Note which band you used, whether you combined approved components, where you stood and which movement you performed. A brief entry such as light tube, standing curl, same foot position is more informative than writing a large total that did not describe the exercise.
Check materials without making assumptions
Fabric describes a surface or construction, not necessarily every material inside a band. A textile loop may still use elastic components. Likewise, a soft cuff can contain padding, webbing, fasteners and metal hardware. Read the specification for the selected product instead of assuming that one visible material tells the whole story.
This matters if you have a known material sensitivity. A fabric cover is not evidence that an item is latex-free. Look for an explicit, applicable material statement and seek clarification if it is missing. Color, smell and appearance are not dependable substitutes for that information. Choose with the same care you would use for another item that stays in contact with your skin during exercise.
Construction photographs are useful for ordinary purchasing decisions too. They can show the width of a loop, the shape of a padded section or how a strap passes through a connector. They cannot establish laboratory performance or an unlimited service life. We prefer details you can inspect and understand over broad claims that every product will perform identically for every person.
Count useful components, not the headline piece count
A large piece count can make two sets difficult to compare. One bundle may count each clip, strap and storage bag separately. Another may describe only its main training components. Neither convention tells you whether the set covers your routine. Make a short list of what you will actually use, then match that list to the selected package.
| Question | What to record | Why it helps |
|---|---|---|
| What supplies resistance? | Number and type of bands or tubes | Separates training elements from accessories |
| How will you hold it? | Handles, loops or the instructed grip | Connects the purchase to your movements |
| What must connect? | Included clips, cuffs and anchor | Reveals missing or incompatible pieces |
| What is storage only? | Bag and organizing accessories | Keeps the piece count in perspective |
| What is not included? | Machine, bench, bar or other equipment | Prevents an incomplete first session |
A well-chosen smaller kit can be easier to organize than a larger one with unused attachments. On the other hand, a bundle can be convenient when you genuinely need its components. Compare the combined contents and the price of the selected option, then confirm the final price and available option in the purchase tab.
Plan the space before the purchase
Lay out the area where you expect to train. You need room for the complete movement, not just enough floor space to stand still. Consider the direction in which a band will pull, nearby furniture, ceiling height and whether anyone else regularly passes through the area. A clear setup is easier to use consistently than one that requires rearranging a crowded room before every set.
If your chosen exercise requires an anchor, use only the anchor and mounting arrangement permitted for that equipment. A door handle, loose chair leg or convenient shelf is not automatically a suitable substitute. Read the anchor's instructions, check the supporting structure and keep others from disturbing the setup. If you cannot establish a suitable anchor, select exercises and equipment that do not require one.
Travel deserves the same planning. A hotel room may have less space, different door construction or surfaces that are unsuitable for your usual arrangement. Pack the equipment you can use appropriately in that setting. The home routine guide explains how to organize a session around the equipment and space actually available.
Choose a manageable first-session option
Your first session with a new set is partly an equipment familiarization session. Read the instructions, identify each component and practice the setup with low resistance before attempting a full workout. A lighter option gives you room to learn the movement and notice whether the band, grip or attachment needs adjustment.
Evaluate the whole repetition. You should be able to begin, move through the intended range and return with control. If you need to jerk the resistance to start or cannot manage the return, the setup needs changing. A stronger band is not a better purchase simply because it makes the movement harder. A set that offers useful steps can be more practical than one option you cannot yet use comfortably.
Different exercises may need different resistance. The band that suits a row may be unsuitable for a smaller upper-body movement, and a loop chosen for one leg exercise may feel different in another. Let the exercise determine the choice. Keep the lighter options available instead of treating them as equipment you must permanently graduate from.
Make inspection and storage part of the decision
Choose equipment you can inspect easily and store properly. Before use, check the elastic material, stitching, handles and connection points. Damage or a questionable connection is a reason to stop using the component, not to cover it with tape and continue. The American Council on Exercise's band guidance emphasizes inspection, controlled movement and never releasing a stretched band.
Follow the care instructions supplied with your particular product. Do not assume that fabric, foam, rubber and metal all need the same cleaning method. Let equipment dry as instructed before putting it away, and keep it away from conditions that the manufacturer advises against. A storage bag is useful for organization, but it should not become a place where damp gear stays forgotten.
Think about where the set will live between sessions. A clean drawer or shelf can make a compact kit easy to reach. Keep loose components together so the correct clips and handles remain with their intended system. Store exercise equipment away from children and pets, and replace worn components according to the applicable instructions rather than an arbitrary promise of lifetime durability.
Three buying situations, three different decisions
You already enjoy bodyweight lower-body sessions
Start by checking whether a short loop is appropriate for the movements you want to add. Compare dimensions, tension options and the inside surface. You may have no immediate need for a door anchor, several handles or a cable attachment. Spend your attention on fit and useful resistance choices, then keep your initial routine short enough to learn the setup.
You want a compact home strength setup
List the pushing, pulling and lower-body movements you intend to practice. A handled system or suitable long bands may cover more of that list, but only if the equipment and available anchoring arrangement support the exercises. Compare the individual components and identify any additional equipment before ordering. The most versatile-looking photograph is not a substitute for that check.
You train at a gym and want personal accessories
Look at the equipment already provided. If the gym supplies the resistance and you need a cuff, handle or pad, choose the accessory that fits that system. Check with the facility about its rules and compatibility. A personal accessory can simplify your bag, but it does not change the machine's operating instructions or make every attachment point suitable.
Read the selected option, not the whole product family
A product family can contain several colors, quantities or equipment combinations. That makes comparison convenient, but it also creates an easy mistake: reading one option's description while imagining another option's photograph. Before purchasing, check the option name beside the price, the included quantity and the image showing the complete contents. If those details appear inconsistent, resolve the difference before proceeding.
Keep your shortlist small enough to compare properly. Two or three suitable choices are usually easier to evaluate than a page full of unrelated equipment. In the fabric resistance band collection, compare loops with loops. In the stretch band collection, pay particular attention to working length and construction. Move to cable attachments when the machine, rather than an elastic band, will provide the load.
For a shared household, write down who expects to use the set and for which movements. Two people may need different options even when they have similar experience. Avoid buying a single high-resistance item on the assumption that everyone can adapt it. Equally, do not assume a band selected for one person is permanently assigned to them; the useful choice is specific to the exercise and the setup.
A simple comparison note can prevent an expensive duplicate. Record the product name, exact option, included pieces, storage needs and one unanswered question. Add a final line for equipment already owned. If a bundle repeats handles or straps you already have, verify whether those existing pieces are actually compatible before deciding that either the new or old component is unnecessary.
Finally, consider the instructions as part of the purchase. A clear component diagram and understandable setup guidance can be more valuable than an extra accessory with no planned use. Keep that information accessible on your phone or with the equipment so another household member does not have to guess how the parts belong together.
Your final comparison before choosing
Open the exact option you intend to buy and work through five checks: format, dimensions, resistance choices, contents and intended connections. Compare the photographs with the written description, especially when several options share a page. Check whether a different color also changes the number of components or the resistance selection.
Then return to your original exercise list. Every item in your chosen kit should have a clear role, even if some pieces are for later use. If you cannot explain why you need an accessory, leave it out of the first purchase unless it is part of a bundle that otherwise fits your needs. Building a useful kit is an ongoing decision, not a requirement to buy everything at once.
Once you have chosen the format, use our practical home routine to plan repeatable sessions, or compare the home and gym combinations in the lower-body equipment guide. Keep the product instructions with the kit so the setup, limits and care advice remain easy to find.